Showing posts with label fruit. Show all posts

July 02, 2013

Cherry Hand Pies


Do you remember your favorite childhood treat?  Mine was Hostess Cherry Pies.  Cloyingly sweet cherry pie filling encased in a lackluster pastry shell coated with a cavity-inducing glaze of white icing.  To think of eating one now does absolutely nothing for me, but the 10 year old version of me would slap me right across the face for such condescension.

It was my favorite of all the pies we had growing up, and believe me, there was no shortage.  On holidays there was the obligatory pumpkin, but once in awhile we were allowed to weigh in on this topic and when the opportunity presented itself, I always chimed in "CHERRY"!
(as I got older, and still to this day... it is peach)


Whenever stone fruit season rolls around, I, like most people, buy pounds of cherries, peaches, plums and nectarines...  and then am in a frenzy to use them up before they go bad.   It's like my Mom has always told me "Your eyes are bigger than your stomach".  I guess they still are. 

So, I find myself with a few pounds of cherries and I had a flashback to walking into Floyd's.
It was a little store on the walk home from school, almost more of a lean-to it was so small.

There was a creaky, old, wooden screen door that would slap shut with a "thwack" every time you walked in, paint barely clinging to it.
The floors resembled a patchwork quilt, tiles being replaced as needed, never all at once.
The cooler near the front hummed loudly as the compressor kicked on and off,  a reminder of where he kept the frozen treats.
Rows of cans and boxes lined up, fluorescent lighting sputtering and buzzing above me.  Being greeted by a gentle smile, always a smile.  My grandmother knew him and therefore, he knew us.  I remember buying bazooka gum for a nickel in that little store.  And Hostess cherry pies.

These portable packages would also be a perfect addition to a picnic basket or say a 4th of July gathering?   Just stack them up on a plate and let people help themselves.  No need for utensils, plates or clean-up, which in my opinion is the best thing about these.  They are little pockets of goodness.


Cherry Hand Pies
makes 18 -20 pies

For the Crust:
(crust recipe from Smitten Kitchen, just barely fussed with)

3 3/4 cups (470 grams) all-purpose flour
1 tablespoon fresh lemon zest
1 1/2  tablespoons granulated sugar
1 1/2  teaspoons fine sea salt
12 ounces unsalted butter, very cold and cut into small pieces
3/4 to 1 cup buttermilk


Whisk together flour, zest, sugar and salt in the bottom of a large bowl. Using a pastry blender, cut the butter into the flour until the biggest pieces of butter are the size of tiny peas. 
Gently stir in 3/4 cup buttermilk with a rubber spatula, mixing it until a bit of a mass forms, then knead it two or three times to form a ball.
If it doesn’t come together, add remaining 1/4 cup buttermilk, 1 tablespoon at a time, until it does, then gently knead again. (I had to add all of the remaining 1/4 cup)
Divide dough in half. Wrap each half in plastic wrap and flatten into a disc. Chill in fridge for at least an hour or up to two days.  (Life got in the way & mine was in there for 3 days... It was fine)

Egg Wash:
1 egg beaten with 1 tablespoon water.  If you want to dust the top with sugar, you will also need sanding sugar or any coarse sugar.
-prepare egg wash, get out the pastry brush & set aside.


Cherry Filling:
3 cups pitted cherries, roughly chopped (about 1 1/2 pounds whole cherries)
1/3 cup granulated sugar
1/4 teaspoon salt
1 heaping tablespoon cornstarch
juice of half a lemon


Combine the cherries, sugar and salt in a medium pot over medium heat.  Cook for about 5 minutes, stirring occasionally, until the sugar dissolves.
Increase heat slightly to bring to a simmer for 5 more minutes. 
In a small bowl, dissolve cornstarch in a few teaspoons of the cherry juice from the pot and stir until smooth.
Pour the cornstarch mixture back into the pot and cook, stirring constantly, until thickened (about 6 to 8 more minutes). Turn off heat and add lemon juice.  Stir to combine.
Transfer to a non-metal bowl and allow to cool.


Assembly line:


Pre-heat oven to 400 degrees and line 3 baking sheets with parchment paper.
Generously flour the counter top, then unwrap one of your disks of dough.  Gently begin rolling it out, starting from the center and pushing outward.  The dough will be pretty firm when you begin, so be patient, but it will warm quickly, so not too patient!
Keep rolling from the center out, turning the dough as you go, until it is about 1/8 inch thick.  If the butter in the dough begins to get too warm and it starts to stick to the pin or gets goopy, slide it onto a baking sheet and put it in the freezer for a few minutes to firm up again.
Once dough is rolled out, cut out with a 2 1/2 - 3 inch cutter, whatever shape you have, or use a knife and cut into squares.  I only had a round cutter of the appropriate size, so that's what I used.
Lightly brush half of your circles or squares with the egg wash, taking care to get the edges, cut vents in the center of the other half of your circles/squares.  Place 1 rounded teaspoon of filling in the center of the egg washed halves and top with the vented pieces. (don't overfill!)  Seal with your fingertips or press with a fork along the edges.
Brush with the egg wash on top and sprinkle with coarse sugar.  Chill in refrigerator before baking if dough begins to get mushy.  Repeat with remaining disk of dough, filling, etc.
Place on baking sheet 1 - 2 inches apart and bake for 15 - 18 minutes until golden and puffed.

Eat. Repeat.

December 18, 2012

Banana Pancakes


This is the story of two sad bananas.  They were gorgeous when I brought them home.  Then they sat there as they watched the other bananas in their bunch get picked, only to be left behind.  Their skin went from bright, sunny yellow to brown and spotty.

Once bananas pass a certain stage in their ripeness, I won't eat them.  It's a texture thing, I don't like mushy food and these were about as "mushad" as one could possibly get. 

Normally I would freeze them for smoothies or wait until I had one or two more for banana bread.
But,  I felt the need to rescue them and do something with them other than relegating them to the dark, frozen tundra that is my freezer.

Pancakes are not usually what I crave for breakfast.  Generally I find them to be too filling, but these are not.  After eating more than my fair share I am happy to report that I did not have that "blegh" feeling after eating.  You know that feeling...  Rewind back to Thanksgiving.  Yeah, that one.

As usual when I am looking for a recipe I know I have, I can't find it.  Luckily I found a good jumping off point on allrecipes and then tweaked it to suit my tastes.

mashing bananas!
 
 
Banana Pancakes
 
1 cup AP flour
1 1/2 tbsp sugar
2 tsp baking powder
1/4 tsp salt
1 egg, beaten
1 cup whole milk
2 tbsp melted butter, cooled
2 ripe bananas, mashed
1/2 tsp pure vanilla extract
1/8 tsp cinnamon
pinch nutmeg
 
 
Combine flour, sugar, baking powder, cinnamon and salt in a bowl.  Whisk to combine.
 
In a medium bowl combine egg, milk, butter, vanilla and bananas.
 
Add dry ingredients to wet, mix until just combined and all flour is incorporated.
Batter will be lumpy, do not overmix. 
 
Ladle about a 1/3 cup batter into pan on medium heat and cook for 2 to 3 minutes per side.

November 20, 2012

Fall Panzanella


I'll be honest with you, I was in the grocery store with a big loaf of crusty bread in my hand thinking "What's the big deal...  I'll just buy it instead of making it", but I JUST. COULDN'T. DO. IT.  
So, I put that gorgeous loaf of bread back amongst it's friends and headed home to start the focaccia. 

I pulled out the stand mixer, made my dough, let it rise...  Placed it ever so lovingly on my sheet pan to puff up again before sliding it in the oven...  And yet, something was amiss.  It just didn't look quite right, but I crossed my fingers and hoped for the best.  Once it was time for the bread to come out of the sauna, I realized I had a bit of a problem.

Not really sure how I screwed it up, but it was more of a focaccia pancake.  It didn't rise properly and looked rather pathetic.  So I salvaged what I could, not wanting to waste everything and started over.  
Truth be told, the Ohio State game was on and I was a tad distracted...  There, I've said it.  I wasn't paying attention to my work,  I was watching football. 
That's what happened.


You know as I was remaking the focaccia, I was thinking "Why didn't I just buy the bread?!"...
In the end, I'm glad I didn't.  Sometimes taking the long road has it troubles but at the end of the day the effort is usually worth it.

So when all is said and done and you are staring at a fridge full of Thanksgiving leftovers, give new life to the roasted veggies hanging around.  It's a great way to use up the ones that always get passed over for everyone's favorite, the mashed potatoes.


Fall Panzanella
1 red onion, diced
1 gala apple, cored and diced
1 granny smith apple, cored and diced
3 cups diced butternut squash, roasted
2 cups red or rainbow swiss chard, finely sliced
5 - 6 cups focaccia or day old crusty bread, cut into 1" cubes
1/2 cup dried cranberries
2 1/2 cups Brussels sprouts, roasted
a few tablespoons olive oil for tossing with veggies/bread

Vinaigrette
2 tbsp apple cider vinegar
1 tbsp sherry vinegar
2 tbsp olive oil
2 tbsp honey
1 tsp salt
1/4 tsp pepper
1/4 tsp fresh thyme, leaves only


Preheat oven to 375 degrees.  If using store bought crusty bread, toss in a little olive oil before toasting bread.  Bake until golden brown and crunchy, about 12 - 15 minutes.

Toss apples and onion in a few tbsp oil, season with salt and pepper and roast for approximately 20 minutes until soft and caramelized.

While bread, onions and apples are in the oven, make vinaigrette in a large bowl and set aside. 
When focaccia is toasted, let it cool slightly then toss in vinaigrette.  Add roasted vegetables, cranberries, apples and swiss chard.  Toss to combine and coat in vinaigrette.
Serve immediately.


September 24, 2012

I'm BANANAS for these muffins...


Now that the temperatures are not hovering near the triple digits, I'm no longer avoiding my oven like the Bubonic plague.   Which is a good thing for me, as I thoroughly enjoy baking. 
I've said it before, it's cheaper than therapy and that is exactly what it is for me...  therapeutic.   It's quiet, calming and serene,  all the things one needs when living in one of the most hectic, crowded, noisiest cities in the world. 

The quiet moments puttering around the kitchen, the sound of the back of a knife scraping across a measuring cup to level off flour, the clinking of the measuring spoons as they delve into baking powder,  these sounds are truly soothing to me.
The warmth and aromas that emanate from the oven... here's where it really starts to get good.

The original recipe called for all-purpose flour and the traditional creaming method.  I opted to follow my friend Jenni's advice and switched out the flour with a lower gluten cake flour and changed the method to include liquid fat, i.e. melted butter instead of chilled.   The oven temp in the original recipe was 350, I cranked it up to 400.   Every professional baker I've ever known has baked muffins at this temp, so I'm not really sure why all the recipes call for 350,  but I digress...

These muffins are so good, I'm not ashamed to say I ate 3 the day they were made.  It was all for research purposes of course!  I couldn't put a recipe here without being completely confident that it passed the test, now tell that to my jeans...


Banana Muffins
-adapted from Cooking Light
  • 2 cups cake flour
  • 3/4 tsp baking soda
  • 1/2 tsp salt
  • 1 cup sugar
  • 1/4 cup unsalted butter, melted and cooled
  • 2 large eggs, room temp
  • 1 1/2 cups mashed banana (3 - 4), room temp
  • 1/3 cup plain Greek yogurt, room temp
  • 1 1/2 tsp vanilla
All ingredients at room temperature


Streusel Topping
  • 1 cup flour
  • 1 cup packed brown sugar
  • 1/2 cup butter
  • 1/2 cup oats
  • 4 tbsp almond flour (optional)
  • 1 tsp cinnamon

look at those PEAKS!


Preheat oven to 400 degrees.

Combine cake flour, baking soda, salt & sugar in a large bowl.  Whisk to thoroughly combine and set aside.

In a medium bowl, whisk eggs, butter, banana, yogurt and vanilla together. Pour on top of dry ingredients and fold gently until just combined.  Do not overmix!  Your laziness will be rewarded, I promise.

Top generously with streusel topping and bake for 14 - 15 minutes.   Cool in pan for 5 minutes, then remove carefully to a rack to cool completely.

No tunnels!

August 25, 2012

Linguini & Roast Chicken


Do you ever have those moments when a completely random thought pops into your head out of the blue for no apparent reason at all?   This happens to me so frequently, that I'm starting to wonder if this is normal...  Well, that is how this recipe ended up here.  

I used to make this for dinner once or twice a month about 10 years ago, then because I had it so often I got sick of it and haven't made it since.  As soon as I tasted it again I realized WHY I ate it so often.  It's really, really good. 

It is about as uncomplicated as you can get, but the flavors are amazing.  The pan juices from the chicken are the sauce for the pasta with a few little goodies thrown in.   Let's talk about the sauce for a minute... 
I know some of you are going to groan that I would suggest tossing pasta in a little bit of chicken fat, but fat is FLAVOR. 

I'm not suggesting you dive into a block of lard with a knife and fork.  The amount of fat is roughly a few tablespoons and unless you've had a triple bypass already, it won't kill you, so live a little...  have a salad for lunch & all will right with the world.


I would normally give you a free pass to use a store-bought roasted chicken, but not this time.   It's the juices from the roasting pan that make this dish.  The deep, roasted flavor that you can not get from anything other than roasting your own chicken.   If you try to use a store-bought chicken anyway, I'll know... 
so don't even think about it


Linguini with Roasted Chicken & Pine Nuts
-recipe adapted from Claudia Roden
  • 3 1/2 - 4 pound chicken
  • 2 tablespoons olive oil
  • 1/2 cup pine nuts, toasted
  • 1 pound linguini
  • 1/2 cup golden raisins
  • 2 sprigs rosemary, leaves removed & chopped
  • 4 sprigs thyme
  • 4 cloves garlic
  • kosher salt
  • freshly ground black pepper
  • 3 stalks celery, cut in half
Preheat oven to 400 degrees. 

Lay the celery in the roasting pan & set the chicken on top of it.  Rub chicken with the oil, sprinkle with salt & pepper.  Place the garlic & the sprigs of thyme around the chicken and roast for 1 hour or until juices run clear.   Let chicken rest 10 - 15 minutes before cutting.

While the chicken is resting, boil the pasta.  Remove 1 cup of boiling pasta water to soak golden raisins.  Let the raisins soak for a few minutes while you get on with the sauce. 

Pour the juice from the roasting pan into a small saucepan.  Add the rosemary, pine nuts and drained golden raisins.  Let the sauce simmer for 5 - 10 minutes.   While the sauce is simmering, pull the meat (and the lovely crispy skin!) from the chicken and set aside.

Drain pasta, toss with chicken and sauce in a large bowl.


August 20, 2012

Doubly Virtuous...


It's that time of year again.  Shopping for school clothes,  temper tantrums over getting up early once more, begging and pleading "please don't make me go", etc...  and that is just the teachers.

Granola is hardly a revolutionary breakfast, but it is a great way to start your day & when turned into bars it's a hand-held portable breakfast which can come in very handy when you've hit "snooze" one too many times.


Now, before you roll your eyes at the mere mention of granola, let me preface it by saying you do not have to be a Birkenstock wearing, tree hugging, peace-lovin' hippie clad in tie dye to appreciate it. 
(Just because I happen to be a few of those things has nothing to do with it...)

It's that perfect mixture of oats/almonds/coconut toasting in the oven & the scent of it lingering in the kitchen that really gets me excited for what's about to happen.  Then, it becomes a bit of a treasure hunt.  I've stated before how I buy things, put them away and then stumble upon them when I'm looking for something else...  well, this is where that comes in handy.


Most of us have some sort of dried fruit tucked away in a pantry and in the baking cabinet there are always lovely additions lurking in there somewhere.   I happened to have some of these ingredients already on hand so I threw them into the mix and others I actually had to go out for. (the OATS!)

The list of ingredients is a suggestion.  I used a ton of dried fruit because I had it.    The recipe is very flexible, you can add in or take out whatever you like.  If you have kids,  get them involved with making this.  They are more likely to eat something if they've had a hand in it...  literally.   They can help measure the ingredients, mix the granola, etc.


Making your own granola ensures that it has exactly what you want in it and a fraction of the sugar that the store-bought variety contains.  Sprinkled over a bowl of Greek yogurt with a drizzle of honey on top,  it is breakfast perfection.


Granola
  • 4 cups old-fashioned rolled oats (can be made GF, make sure the label says gluten-free)
  • 1 1/2 cups coconut
  • 1 1/2 cups sliced almonds
  • 1/2 cup dried apricots, small dice
  • 1/2 cup dried figs, small dice
  • 1/2 cup pitted dates, small dice
  • 1/2 cup dried cherries
  • 1/2 cup dried cranberries
  • 1/2 cup golden raisins
  • 1/2 cup green pumpkin seeds
  • 2 tbsp chia seeds
  • 1/2 tsp kosher salt
  • 1/2 cup canola oil
  • 1/2 cup honey

Preheat oven to 350 degrees.

Combine oats, almonds, coconut and salt in a large bowl.   Add oil, then honey to a 1 cup measure and pour over mixture.  Oil will prevent honey from sticking and it will all pour out easily.   Stir to evenly coat oat mixture.

Bake, stirring once, for approximately 25 - 30 minutes until mixture is golden brown.

Remove from oven and allow to cool, stir occasionally or it will become a solid mass.
(I learned this the hard way the first time I made granola, so I'll save you the heartache)

Once mixture is cooled, combine all ingredients in a large bowl, stir to thoroughly combine and store in an airtight container.


Granola Bars


  • 3 tbsp unsalted butter + extra for baking dish
  • 1/3 cup honey
  • 1/4 cup brown sugar
  • 6 cups granola
Preheat oven to 300 degrees.  Coat bottom of an 8x8 glass baking dish with non-stick spray and line with parchment paper.  Butter parchment paper inside baking dish & set aside.

Melt butter, mix in honey and brown sugar. 
In a large bowl, combine granola & melted butter mixture.  Stir to combine.

Pour mixture into prepared pan & with wet fingers press down firmly on granola.

Bake for 20 - 30 minutes, cool completely and let set for 3 hours before cutting into squares.  I usually let mine set up overnight before I cut them, but if you can't wait make sure they are completely cooled before cutting them or they will fall apart.


August 14, 2012

I'll have what she's having...


I'm not really sure why,  but when I think of strawberry daiquiris, I think of the 80's.   Things like parachute pants and rubber bracelets,  big hair and Duran Duran.  Considering I was barely a "tween" in the mid-80's and not yet the cocktail connoisseur I am today, there really is no basis for this. 

But, here's the thing... no one seems to tip back fruity drinks with little umbrellas anymore, everything is a "skinny" something or another now.  Not that there's anything wrong with watching your caloric intake, but sometimes a girl needs a drink.  A proper drink- made in a blender, served in a pretty glass with a little garnish.

I'm sure most of us can't even remember the last time we had one (unless of course that's because you had MANY), which is a shame because it really is one of those great summer drinks.
Well, I intend on bringing this little libation that could back into the spotlight.

If you've never had a strawberry daiquiri made from actual strawberries, then you are in for a treat.  The drinks made from that bottle of  chemical-laden red stuff can not begin to compare with one made from fresh ingredients.  The sweet fragrance of ripe strawberries filling your kitchen is enough to start your mouth salivating.

There will be no sickly sweet, artificially flavored mixes that are a most unnatural and slightly unnerving shade of red.  Just berries, rum, some sugar & a splash of lime juice blended with some ice & you are well on your way to one of the best things you can put in a glass.

It is summer so get some local berries and throw them in the blender, saunter out to the porch/patio/deck, put your feet up and put on some of your best 80's tunes...


Strawberry Daiquiri
  • 4 cups strawberries, hulled & halved
  • 1 cup white rum
  • 1/4 cup fresh lime juice
  • 1/2 cup simple syrup
  • 1 cup crushed ice

- Throw everything into the blender & let it rip... 
If you like your drinks a little "slushier" (yes, that's a word now) add in another 1/2 cup or so of ice.


Cheers!

August 10, 2012

On the Lanai...

I have this nonsensical love of the Golden Girls, to the extent that I kind of want to be them when I grow up.  Not any one of them in particular (although Blanche certainly had lots of fun), but more of an amalgamation of them.  

Dorothy's intelligence and dry wit, Rose's willingness to always see the good in people, Sophia's crass humor and we've already covered Blanche's obvious contribution to the mix.

I can fully appreciate sitting around the kitchen table with an entire (yes, an ENTIRE) cheesecake to work out life's woes with your best pals, but my fascination is the lanai...  Just the word makes you relax a bit , doesn't it?  (go ahead, say it aloud...  I'll wait)

I remember hearing that word as a fourteen year old kid watching this show and not even knowing what it was, but liking sound of it. 
Eventually, when I pieced together what a "lanai" actually was, I thought to myself  "oh yeah, that's for me"...


As the afternoon sun starts to set, turning the sky a beautiful blush pink, the palm trees sway in the warm coastal breeze and I am sitting out on the lanai with a crisp white wine and a few friends.

Nothing could be further from my current reality, but this is what I envision as my "someday".    When the crowded streets, honking car horns, screeching brakes of city buses and  shrieking sirens get to me,  I close my eyes and go here.

In my "someday", I set out trays of little nibbles for my friends and I to pick upon while we sip our wine and solve the world's problems...  before we head back inside to give that cheesecake a proper send off.


Tartine
A tartine is an open faced sandwich.  A single slice of bread, toasted and topped with whatever suits you.  It can be sweet or savory, eaten for breakfast, lunch, dinner or a snack.  It is great for when friends pop over, because you can top it with anything you have in the house.
Cheese, meat, thinly sliced vegetables & eggs are all common toppings and most of us generally have these hanging around the kitchen which makes this a snap to put together.


  • Country or Sourdough bread, sliced (nothing too porous)
  • 2 Bosc pears, peeled & cored
  • 1/2 bottle (750 ml) red wine
  • 1/2 cup sugar
  • 1 piece cinnamon stick
  • 1 star anise
  • 1/2 tsp black peppercorns
  • 1 inch piece ginger, peeled & thinly sliced
  • 3 oz. gorgonzola dolce
  • 3 tbsp. honey
  • 1 oz. sliced almonds, toasted
  • sprinkling of thyme leaves


1. Combine wine, cinnamon stick, star anise, peppercorn, ginger, sugar & pears in a medium saucepot.


2. Bring to a simmer and cook pears for about 15 - 20 minutes.   Let cool completely in liquid.
    (the longer they sit, the darker they will get)
3. Once pears are cooled completely, remove from poaching liquid.  Strain and put liquid back on heat to reduce down until thick and syrupy. 


4. Thinly slice pears and set aside.
5. Toast bread, top with gorgonzola, pears, honey, reduced poaching liquid and sliced almonds.


  • prosciutto (about 3 slices per piece of bread)
  • parmesan
  • fig jam
  • baby arugula

    1. Toast bread, top with fig jam (homemade or store bought).
    2. Arrange prosciutto on top of jam, add a sprinkling of baby arugula leaves and top with a smattering Parmesan curls.

August 04, 2012

Plum Crazy...


Maybe it's just me, but it seems like every year summer goes by even quicker than it did the year before. 
I wait and wait all winter for stone fruit season to arrive,  daydreaming about all of the amazing things I'll make...  fantasizing about juicy peaches, ripe plums and perfect nectarines. 

Awaiting that first taste of summer, sinking my teeth into the perfect bite, juice dribbling down my chin... 
and then it's August.

When did that happen?!   I realize I barely had a chance to make any of the delectable things I spent so many hours, days, weeks thinking about.  And here we are again, summer more than halfway gone.
So, upon this rather startling revelation I decided I had better get it in gear if I was going to accomplish at least a few of the things I had set out to do.

For those of you who may not know, a crostata is a single-crust, free-form pie.  This is good news for the likes of me as I find rolling out multiple pie crusts in the heat of August a nearly impossible feat. 
If I had central air-conditioning and a marble slab in my kitchen, I'd be much more agreeable.


Plum Crostata


for the dough:
  • 1 1/4 cups all-purpose flour (plus extra for dusting)
  • 2 tbsp sugar
  • 1/4 tsp salt
  • 1 stick butter (not margarine) cubed into small pieces & chilled
  • zest of one lemon
  • 3 tbsp ice water

In the bowl of a food processor,  pulse together dry ingredients until well combined.   Add in butter until mixture resembles coarse crumbs.  I usually keep my butter in the freezer for this so it stays really cold as it is being incorporated.   Add in ice water, pulsing machine until it almost forms a ball.  Do not over work dough.  Remove from food processor and flatten into a disk.  Wrap dough in plastic and refrigerate for at least an hour.   You can do this a day ahead.


for the filling:
  • 6 ripe plums, sliced 1/4" thick ( I used red & black plums)
  • zest of 1 lemon
  • juice of 1/2 lemon (or 1 whole, if small)
  • 5 tbsp sugar
  • 2 tbsp flour 
Mix all ingredients together and set aside.


for glaze:
1 egg
2 tbsp honey
1 tbsp sanding sugar


assemble crostata:

Preheat oven to 400 degrees.

Remove dough from refrigerator and place on a baking sheet lined with parchment paper and lightly floured.  Press out the dough until it is approximately 11 inches in diameter. 

You can roll it out with a pin if you like but I chose to just press it out.  My kitchen was very warm and the dough was getting a little too soft, as the butter in the dough was beginning to melt so I had to go with it.  I had already put it back in the refrigerator once...  It was just too warm of a day (lesson learned). 

Place fruit in center and bring up edges of dough to the center, pleating dough as you go.  If you really want to impress, lay fruit in a circular pattern and then fold dough over.  If dough breaks, don't sweat it...  just pinch it back together.  It's supposed to be "rustic", right? 
Well, mine certainly was! 
(The crust didn't hold in a few spots,  let's just say that gave it "personality")

Brush crust with honey/egg mixture and sprinkle sanding sugar on crust.
Bake for 20 - 30 minutes until crust is golden brown and fruit is bubbling.

A scoop of vanilla ice cream on this would be divine...  just sayin'


.

July 24, 2012

London Calling...


Cherry season is so short, about 3-4 weeks actually, that when I see them starting to appear in the markets I can hardly contain myself.  I go on cherry overload and I know I'm not alone.  I buy bags and bags of them, but then a few days pass and I realize I haven't touched them.  Like most people, I was brought up not to waste food and in professional kitchens, that is a cardinal sin.

There are a couple of pounds of cherries in my fridge and I've eaten my fair share of them as is, but I'd like to actually make something with them!  Hmmmm...  gears turning, little librarian in my head frantically thumbing through cookbooks, whizzing past shelf after shelf on the rolling ladder...

Cherry pie, cherry cobbler, cherry muffins, cherries jubilee, cherry crisp... Cherry ice cream, cherry slushies, cherry lemonade, cherry jam, cherry tart, black forest cake, peach raspberry galette, cherry crostata... 

The cherry recipes are endless and all sound like a great idea, but then it hits me.  The Olympics are in less than a week and in LONDON!  Cherry scones it is!   

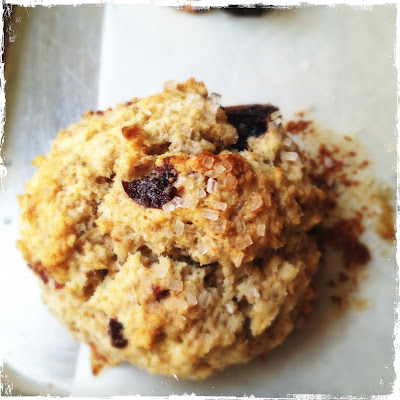
I don't own a scone pan, but if you do feel free to break it out.  I simply don't have room for many single purpose items.  The other option with these is to pat the dough out to roughly an inch thick and cut scones from there. Lightly flour the counter,  shape dough into a rectangle, cut into squares and cut squares on the diagonal to form triangles.

However, if you also have little to no counter space scooping may be the way to go.

Put on a pot of tea and pass the clotted cream & jam please...


Cherry Scones
-yields 15 mini scones
  • 1 1/2 c. all-purpose flour
  • 1/2 c. whole wheat flour
  • 6 tbsp butter
  • 4 tbsp sugar
  • 2 tsp baking powder
  • 1/2 tsp baking soda
  • 1 tsp salt
  • 1/4 c. sour cream
  • 4 tbsp whole milk
  • 1 lg egg
  • 1 1/2 c. cherries, pitted and chopped

Preheat oven to 400 degrees.

Cut butter into small pieces and place in freezer. 
In the bowl of a food processor, pulse together all dry ingredients.

In a small bowl, whisk together milk, egg and sour cream until completely smooth.  Set aside.

Add chilled butter to dry ingredients and pulse until mixture resembles coarse crumbs.  Add wet ingredients and pulse until just combined.   Do not overmix!

Remove dough from food processor and put in large bowl.  Add cherries and mix just until incorporated.   Try to be as gentle as possible with this as the cherries will bleed a bit when pressed too much and the dough will become tough if overworked.


Using a medium (3oz) cookie scoop,  scoop out dough and place on baking pan lined with parchment paper.  Very lightly press down the top and sprinkle with coarse sanding sugar. 


Return tray to refrigerator to chill for 15 minutes.   Bake for 13 - 15 minutes.