Showing posts with label butter. Show all posts

May 01, 2013

Key Lime Pie


Key Lime Pie.   These three little words make me sit on the edge of my seat in anticipation.  In my book, it is one of the most perfect desserts.  The fact that it is ridiculously easy gives it major bonus points. 
Growing up, I don't think I'd even heard of key lime pie.  We had apple, peach, strawberry-rhubarb, blueberry, pecan, pumpkin, lemon meringue, chocolate cream, but never key lime. 

Perhaps that is why I have developed a serious love for this barely green, barely sweet little tart.
We weren't introduced until I was able to have a proper appreciation for something so perfect in its simplicity.
My insatiable sweet tooth has been discussed on several occasions right here on this very blog and although I won't deny that I love dessert, what I do not love is desserts that are cloying.

That makes this pie the perfect sweet for me.  It is creamy and smooth,  just barely sweet with a nice tart bite that gets you right on the sides of your tongue making you immediately go back for more (or maybe that's only me).
The graham cracker crust harkens back to pre-school with it's sweet smell that makes one long for mandatory nap time.


Key Lime Tart
recipe barely adapted from America's Test Kitchen

I wouldn't dare suggest that you only make this pie with actual key limes, as most of you probably don't have access to them.  I made this filling with regular (Persian) limes and their zest.  I also tried bottled key lime juice, but preferred the juice of fresh limes for their bright, citrusy flavor.

Normally, the filling for this pie is not cooked and it sets up in the refrigerator.  I'm sure those of you that have ordered (or even made) key lime pie have found yourselves a bit disappointed on occasion.  Although the filling is set enough to slice, it can be a bit too loose.  After reading dozens of recipes, I found a solution: 
a short stint in the oven to set the filling resulted in a creamy, custard-like filling that set beautifully and sliced perfectly clean. 

-This recipe will make a 9" pie or 4 tarts (4 1/2" size)


For the filling:
4 large egg yolks
1 heaping tbsp. grated lime zest
1/2 cup fresh lime juice (about 5 - 6 limes)
1 can sweetened condensed milk (14 oz)
tiny pinch salt


Whisk egg yolks and lime zest together in a medium bowl.

After 1 1/2 - 2 minutes, your mixture should look like this.  Bright yellow - green from the lime zest.  No need for green food coloring!

Whisk in condensed milk until mixture is smooth, then whisk in lime juice.  Cover and set aside.

Now make the crust...


For the Crust
8 graham crackers, broken into pieces
5 tbsp. unsalted butter, melted and cooled
3 tbsp. sugar
pinch salt


Preheat oven to 325.   Put graham crackers in food processor and run for about 45 seconds until you have fine crumbs.   Pour melted butter over crumbs, add sugar & salt and pulse (5 -7 times should do) until you have what resembles wet sand.


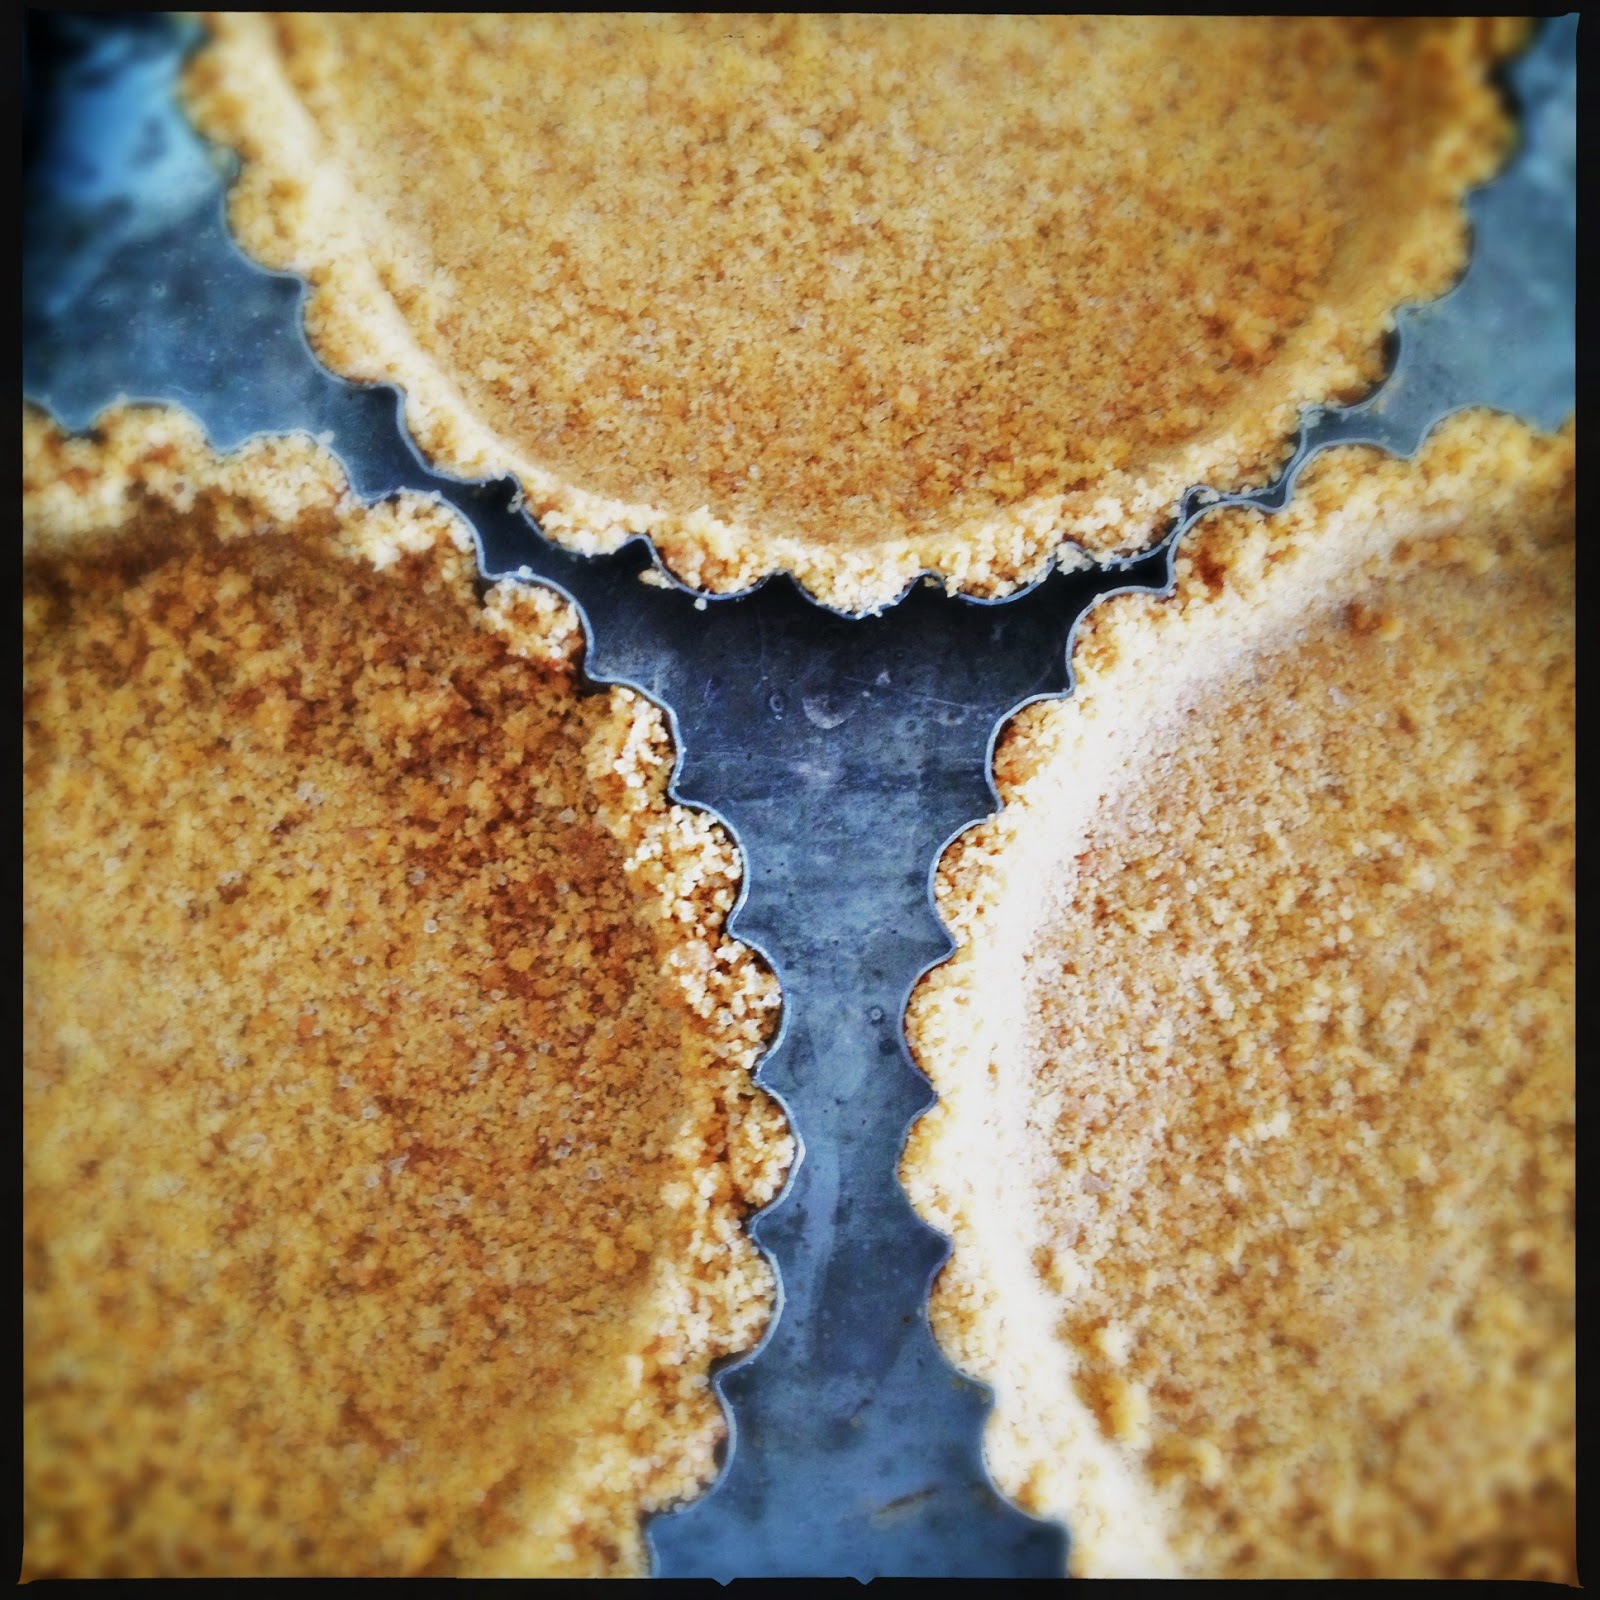
Pour crumbs into pie plate, (or if using tart molds: 1/4 - 1/3 cup in each) pressing crumbs into an even layer on bottom and sides. 
Using the bottom of measuring cup makes this task much easier!
Bake crust for 13 - 16 minutes (tarts: approx. 12 minutes); remove from oven and set on wire rack. 
Do not turn off oven.

Pour filling into warm pie crust and bake 15 - 18 minutes (tarts: 10 - 12 minutes).  Remove from oven and let them cool for about an hour before refrigerating. 
Once cooled, place in refrigerator for 2 - 3 hours until chilled and set.

Top with whipped cream.

March 21, 2013

Buttermilk Biscuits


Sometimes it's as if people are dropped into your life out of the blue.  This is the story of  one such person.  I was lucky enough to have made a connection with another food blogger and Pastry Chef.  We "met" through Facebook & Twitter.  Like many other food bloggers, we are on each others pages.  We offer support, ask questions and weigh in on life-altering discussions about butter and how best to photograph one's creations. 

During the course of a few months, we discovered how very much alike we are... although she is definitely the nicer one.  She has become my "Sissy" and this happened the day I met her in person.

I was travelling when she & her Beloved husband graciously offered their home to me for a night instead of having to stay in a hotel.  We were sitting in her kitchen and I had asked her if there was a store nearby because I was desperate to get my hands on some White Lily flour... (she remembers this part a bit differently)

As if by magic, she disappeared into a pantry and before I knew where she had gone, she was standing in front of me holding up the sought after bag of flour as if it were nothing.  She said "You mean THIS flour?!".   I couldn't believe it.   I was thrilled and I meant to do it justice with some serious biscuits.


It had sadly been sitting in my cupboard for a little while before I had gotten to it, always clearing it's throat when I opened the cupboard door.  As if it needed to remind me of its presence.  Hardly.   Finally, one day I had it set in my head to get cracking.

So, off to the store I went to grab a few things. Traditionally biscuits are made with shortening. I was against this from the start, but also curious to see how they would compare side to side against those baked with only butter.  I had the Crisco in my hand.  I.  just. couldn't. do. it.

It was as if every single cell in my body was rebelling and screaming "NOOOOOO!  Put it down & back away..."   So I did. 
I guarantee those of us that have had biscuits at a restaurant have eaten them with shortening, or worse.  And I'm certain that I liked them, but I just could NOT buy the tub of Crisco. 
So, there you have it.  Experiment aborted, but I hope I will be forgiven once you taste these biscuits.


"Sissy" Biscuits

2 c. AP flour, preferably White Lily
1 tbsp. baking powder
1 tsp. salt
1 tbsp. sugar
1/2 tsp. baking soda
6 tbsp. chilled butter
3/4 c. buttermilk + extra for brushing on top


These biscuits are delicious as is or split open with a bit of honey or strawberry jam.  You could go all out and make gravy for a nice weekend breakfast or brunch or have breakfast for dinner!  Need a little herbiness?  Chop up some fresh herbs like dill and sprinkle in for extra flavor.

Preheat oven to 475 degrees.  Line sheet pan/baking sheet/cookie sheet with parchment paper.


Sift flour, baking powder, salt, sugar and baking soda together.  Using a pastry blender (or your fingers) cut in butter until mixture resembles coarse crumbs.


Add buttermilk and stir in flour just until it comes together.  Dough will be sticky.
Turn out onto a floured surface, pat dough out and fold over on itself a few times to help create layers.


Pat out to desired thickness.  I did mine about 1/4 inch... too tall and they will topple over.
Using a biscuit cutter/cookie cutter/juice glass, cut out biscuits by pushing straight down.


Lay biscuits on parchment lined sheet pan and brush tops with buttermilk.
Bake for 8 - 10 minutes. 


Be sure to keep on eye on them after 6 or 7 minutes.  You may need to adjust baking time based on your oven.


January 21, 2013

Blushing Valentine


I know it may seem a bit early to start thinking of Valentine's Day, but it's only a few short weeks away.   If you like to make a special treat on Valentine's Day, this is the cake.  
It is a towering 4 layers high and lovingly encased in the most delicate rose-scented buttercream.  It is outrageously good and worth every. single. calorie.  

This is also the type of cake that could easily become adorned with say a few candles for a little celebratory birthday party?   The colors could be swapped out for any, the flavor of the buttercream could be adapted to whatever you'd like it to be.  Using a vanilla base for both cake and buttercream allows you the flexibility to change colors and flavors to suit the occasion or intended recipient.

Typically, when we think of Valentine's Day desserts we usually think of chocolate.  I won't even pretend that I'm not one of them, but sometimes the "molten lava cake" or "ganache-covered devils's food" is well... a bit played out.

This cake is a show-stopper and you might not even miss the chocolate.


For the cake:
3 sticks unsalted butter, room temp
3 ½ cups sugar
4 cups King Arthur AP flour
4 tsp. baking powder
1 tsp salt
12 egg whites-Pete & Gerry’s Heirloom Eggs, room temp
2 cups whole milk, room temp
4 tsp vanilla
Deep pink gel food coloring


Place racks in middle of the oven and preheat to 350 degrees.  Butter and flour 4 cake pans.  I used 6", but 8 inch will work as well (the cakes will not be as tall).


In the bowl of a stand mixer, beat butter and sugar together for 5 minutes until light & fluffy.

Sift flour, baking powder and salt together and set aside.
Combine egg whites, milk & vanilla together and set aside.

Add roughly 1/3 of the flour mixture to the butter and sugar, followed by half of the milk mixture.  Scrape down bowl, and then add another 1/3 of the flour mixture and the rest of the milk.  Scrape down again and add the last of the flour.

Divide batter into 4 equal portions.

      One portion will remain white.  In the remaining 3, mix in food coloring.  Add 3-4 drops to the first layer, 6-7 drops for the second and 9-10 drops for the last layer.  Mix thoroughly until color is uniform. 

      Pour into cake pans and bake for 25 – 30 minutes, rotating cakes halfway through baking time.  Cake is done when knife inserted comes out clean.  Cool in pan for 10 minutes, then carefully remove from pan and transfer to a cooling rack to cool completely.

Wrap in parchment paper and plastic wrap and chill at least 3 hours.  Using a long serrated knife, trim off the domed top of cake to make it even and flat.   Once all cakes have been trimmed, set aside.


For the Rosewater Buttercream
4 egg whites: Pete & Gerry’s Heirloom Eggs
1 cup sugar
3 sticks unsalted butter at room temp, cut into tablespoons
½ -1 tsp rosewater


      Set a bowl inside of a pot of simmering water, making sure the bottom of the bowl does not touch the water. Combine egg whites and sugar, whisking frequently until sugar has dissolved. 

 You can test this by carefully running your finger through a stream of egg white falling from whisk, then rub your thumb and finger together.  If you feel any grains of sugar, it is not ready.

      Once sugar is completely dissolved, transfer mixture to the bowl of a stand mixer fitted with the whisk attachment.
      Beat egg white mixture on high speed until it holds stiff peaks and mixture is cooled, about 5-6 minutes.
  
      Turn mixer down to medium low speed and begin adding butter, a few tablespoons at a time, let butter incorporate before adding more.


      After all the butter has been added, add rosewater and beat for another 30 seconds.
      Set darkest layer of cake on cake plate and apply a layer of buttercream to top.  Following with remaining layers, ending with white layer on top. 

Apply a thin crumb coat of buttercream to entire cake and chill for 30 minutes.


When crumb coat has hardened, apply buttercream and smooth with an off-set spatula.
Cut with a very sharp knife and serve!


May 25, 2012

Hello Cupcake...


For weeks I've been craving cake... so, enough talk and a little more action.   I decided that since I had been to the farmer's market and had eaten a relatively healthy lunch that cupcakes were definitely in order.

If I'm going to make cupcakes, more often than not I would go all in.  Chocolate.  The darker & richer the better...  however since it is spring and this weekend marks the "un-official" start to summer I wanted to lighten it up a bit and do something a little different.

If you are anything like me, sometimes you forget all the little treasures you have stashed in your kitchen.  I buy things that interest me and then put them away for when the mood strikes, but the unfortunate truth is that occasionally they are forgotten until I stumble upon them (usually when I'm looking for something else).

Well, the latest treasure to be unearthed was candied ginger.  I thought it might make an interesting garnish for the cupcake and that was basically my jumping off point.
(well, that and my persistent sweet tooth...)

If you are attending (or hosting) a BBQ this weekend, these would make a great finale.  They are light and not overly sweet and another plus is that the cake can be made ahead and frozen for a few days, then thawed and frosted the day of. 

For ginger flavor, I would normally add ground ginger, however I've decided to infuse them with a ginger syrup in lieu of the adding the powder to the batter. I wanted a lighter ginger flavor and to avoid a "gingerbread" taste.  If you prefer to use ground ginger, 1/2 - 1 tsp will do the trick.


Ginger Cupcakes with Lemon Buttercream
- cake recipe adapted from the kitchn
  • 2 1/4 cups all purpose flour
  • 3 1/2 teaspoons baking powder
  • 1 tsp salt
  • 1 1/2 cups sugar
  • 1 tsp vanilla
  • 1/2 cup room temperature butter
  • 1 1/4 cups whole milk
  • 3 large eggs
  1. Preheat oven to 350 degrees
  2. Line muffin tins with cupcake papers,  you'll need approximately 22
  3. In a medium bowl, cream the butter and sugar together until light and fluffy.  Add the eggs and beat until thoroughly incorporated then beat in flour, salt and baking powder.
  4. Stir in milk and vanilla. Beat on low for 30 seconds, then on high for 3 minutes.
  5. Scoop batter into cupcake pan, I always use a cookie scoop to ensure uniformity.
  6. Bake for approximately 15 - 18 minutes or until a skewer inserted comes out clean.
  7. Cool slightly, then using a thin skewer pierce a few holes into the top of the cupcake and lightly brush with the ginger simple syrup.  Try not to be too heavy with the syrup, or you will end up with mushy cupcakes. 
  8. When completely cooled, frost with lemon buttercream and top with finely sliced candied ginger.

Ginger Simple Syrup
  • 1 cup sugar
  • 1 cup water
  • 1 thumb sized piece of fresh ginger,  sliced into coins
Combine everything in a small pot and bring a boil, stirring occasionally.  When sugar has completely dissolved, remove from heat and cool completely. 
Once the syrup is cooled, strain the ginger & discard.   Leftover syrup can be stored in the refrigerator for up to a week.
(I like to boil it down until it is very thick & syrupy and drizzle over vanilla bean ice cream or use it in cocktails!)

Lemon Buttercream
  • 4 cups powdered sugar
  • 1/2 cup room temperature butter
  • 3 tbsp milk
  • 1 tsp vanilla
  • zest of 1 lemon
  • juice of 1/2 lemon

Combine all ingredients in a large bowl and beat on low speed until combined, then on medium until light and fluffy (about 2 minutes)


May 22, 2012

If You're Afraid of Butter, Use Cream...

The above is one of my favorite quotes from Julia Child, one of the gutsiest broads to ever hoist a meat cleaver. (and I use that term lovingly)


On August 15th of this year, Julia would have turned 100 years old and I'd like to think would still be cooking.
In the 100 days leading up to Julia's birthday, the JC100 is celebrating this culinary powerhouse and her recipes.  Each week, a new recipe is featured and this weeks offering was Coq au Vin...  one of my all time favorites.

I remember watching Julia & Jacques and loved her candor and fearless approach to cooking.  She made it seem fun and most importantly, possible.  She had a way of walking her audience through a recipe that made complex dishes seem effortless and isn't that all we really want? To feel like anything is possible?

Her sing-song voice demonstrated her unmistakable excitement for what she was doing, especially when butter was involved.  She made no apologies for anything, especially her occasional mishaps in the kitchen.   For example, you dropped the chicken?  No big deal, pick it up & rinse it off!   I loved that.  It was like being told, it's ok if it all doesn't go perfectly as planned...  just keep cooking.

Her contributions to cooking and bringing knowledge of French cooking to the American public are unparalleled.  She was truly one of a kind. 

This is my all time favorite quote and precisely why I can relate to her... 

The best way to execute French cooking is to get good and loaded and whack the hell out of a chicken. Bon appétit. ”
― Julia Child


Coq au Vin
  • 2 1/2 to 3 pounds frying-chicken parts (roughly 1 whole chicken, cut up)
  • 2 tbsp butter
  • 1 tbsp olive oil
  • 3 cups sliced onion
  • salt and freshly ground black pepper
  • 1 - 2 large cloves of garlic, pureed
  • 1 bay leaf
  • 1/4 tsp thyme
  • 1/3 cup canned Italian plum tomatoes
  • 3 cups young red wine
  • 1 cup chicken stock
  • beurre manie for the sauce: (1 1/2 tbsp each flour and softened butter blended to a paste)
  • chopped parsley
  • 3 cups fresh mushrooms, trimmed, quartered and sauteed
  • 1/2 cup bacon, cut into 1/4 inch strips (original recipe calls for bacon to be blanched, however I like the saltiness of the bacon so I omitted this step)

    1. In a large, heavy-bottomed frying pan, saute the bacon and remove to a side dish, leaving the fat in the pan.
    2. Season the chicken with salt and pepper.
    3. Brown the chicken in the pork fat, adding a little olive oil if necessary.  Remove and set aside.
    4. Add the onions into the pan and saute over moderate heat until fairly tender, then raise the heat slightly to brown lightly.  Drain to remove excess fat.
    5. Return chicken to the pan with the onions, garlic, bay leaf, thyme, tomato and mushrooms.
    6. Pour in the wine and enough stock to barely cover and simmer slowly for 20 minutes.
    7. Remove chicken from pan and spoon surface fat off the cooking juices.   
    8. Taste the mushroom/onion cooking juices, boil down if it needs strength, adding seasoning if necessary.  Off heat, whisk in beurre manie to make a lightly thickened sauce.  Bring briefly to a simmer- the sauce should be just thick enough to lightly coat a spoon.
    9. Return chicken to pan, basting with sauce, onions and mushrooms.

      * I always serve this over lightly buttered egg noodles, it goes perfectly with the sauce.  You could also serve it with rice or to avoid starch completely, serve with a green salad.

      Excerpted from The Way to Cook by Julia Child. Copyright © 1989 by Julia Child. Reprinted with permission from the publisher Alfred A. Knopf, a division of Random House, Inc.

      May 10, 2012

      My first love...

      Look at that gorgeous kid...  and the baby isn't bad either!

      The first love of my life: my Mom.  As little girls, we often play "house" and pretend to be Mommies to our baby dolls and try to emulate our own mothers.  As teenagers, we are less inclined to compare ourselves to our Moms. As adults we come full circle, realizing that "Mom" is a person just like we are who had worries and struggles, peacefulness and triumphs .  Mine, like most, had to balance job and kids, errands, our activities, laundry, blah, blah, blah... and yet still found time to take us to movies or little excursions.   We didn't have much, but we didn't know it.  She made the most of what we did have and rarely did we feel like we had "gone without".

      One of my all-time favorite memories, which my Mom & I still giggle about to this day...  Ok, this is going to date me a little, but you regular readers already know I turned 40 recently,  so here we go:

      Do you remember that show from the '80's, "V"?!   It was about alien-lizards disguised as humans living on Earth.  We LOVED this show.   It sounds ridiculous, but it was the early '80's... 
      Well,  one night we were in our Chevrolet Chevette hatchback (yes, a Chevette hatchback...  named "Skeeter", btw) and there were radio and television towers with flashing red lights on the road.  They looked like they were so high up in the sky to me as a little kid...  like they could have been lights on an alien spacecraft!  

      All of a sudden, my Mom hunches down over the steering wheel and starts saying "Oh no, they're gonna get us!"  Well, you can imagine our reaction!  My brother & I started screeching & laughing like crazy and she just kept egging us on... 

      She pretended like she was racing down the road, although I highly doubt she ever broke the speed limit, and we just kept looking behind us as if the lights on those towers might actually be the "V" coming to get us!!!  
      I will freely admit that whenever I'm home and on Dustin Road, I think of this & laugh and if I have my Mom in the car...  you know what happens next.

      My Mom always wanted to be a mother.  Looking at family photos, you can see it in her face.  Having children truly did bring her joy...  I'm sure it also brought heartache, frustration, worry, stress, etc. but we rarely knew it.  However, it was crystal clear when I was a teenager... because I'll be completely honest,  I was a pain. 

      The wonderful thing that happens between mothers and their children (if you're lucky) when you become an adult is the transformation in the relationship to friendship. 
      I can call my mom and chat in the same way I can with friends and that is a rare gift. 
      She has become less of a parent and more of a confidant in my adult years.

      I am one of the lucky ones.  I was born to a woman who has always been my beacon of light calling me home to her safe shores.  Raised with love and laughter, music and dancing in the kitchen... I am one of the lucky ones and I am thankful.

      Happy Mother's Day!

      The recipe below is from my Momma,  another food memory from childhood...

      Dutch Puff Pancake
      • 1 cup milk
      • 2 large eggs
      • 2/3 cup flour
      • 3 tbsp sugar
      • 1/2 tsp salt
      • 1/2 tsp grated lemon zest
      • 2 tbsp butter

      1. Place a rack in the middle of the oven and preheat to 400F.  
      2. Put butter in pie plate and put pie plate in oven to heat while making batter. (could also use cast iron skillet or heavy-bottomed frying pan)
      3. Put rest of ingredients into a blender.   Blend until well combined.
      4. Carefully pour the batter into hot pie plate.
      5. Bake for 25-35 minutes until puffy and deep golden brown.
      6. Dust with powdered sugar & serve immediately, pancake will collapse shortly after removing from the oven.

        April 24, 2012

        Cheaper than Therapy...


        Songwriters often say that they do their best work when they are going through something difficult in their lives.  They channel those feelings and pour them into lyrics that move us to our very core.
        I don't write music...  I sequester myself to the confines of my kitchen.

        Being in the kitchen is cathartic for me, it always has been.  Looking back, I've realized that it is one of the reasons I love baking. 

        It brings me comfort in times of sadness, calms me when I'm stressed or anxious, reassures me when I've had a particularly rough day. 

        Baking is my therapy and let's face it...  it's cheaper than $150 dollars an hour and much tastier.

        I find solace in the kitchen, the familiar smells and sounds, the warmth of the oven...  being able to "shut off" my brain and do things on autopilot also brings a certain sense of comfort.

        Once again, I find myself puttering about in the kitchen late at night when the rest of world is fast asleep.  

        I wanted to make a cherry clafouti and thus began the research.  I read that traditionally the French use whole cherries because the pits give an almond flavor to the dessert.   My thoughts were something like this:  "I like the people I'm going to feed & would rather they didn't need an emergency dental appointment after eating my food". 

        I wanted to use almond extract to impart that flavor, I knew I had some, but where...  So,  after about 5 minutes of searching I decided since I had almond flour, I would use that instead.

        Thanks to a friend of mine, I had a few jars of sour cherries (sans pits!) that were calling to me from the cupboard.  They were begging to be used in some late night venture and needing to oblige, they were promptly removed from their dark shelf and opened.

        ps~ made a second batch with a few drops of the afformentioned almond extract, both ways were delicious. 

        Cherry Clafouti
        • 4 large eggs
        • 4 egg yolks
        • 1/2 cup powdered sugar
        • 1 tbsp vanilla extract
        • pinch salt
        • 1 cup whole milk
        • 1/2 cup heavy cream
        • 1/4 cup almond flour
        • 3/4 cup all-purpose flour
        • 1 lb cherries (I used sour cherries in syrup, drained, syrup reserved)
        • 2 tbsp butter + flour for pan
        • powdered sugar, for dusting

        1. Preheat oven to 375 degrees.  Butter and flour a deep 9 inch pan or an extra large muffin tin. (Using the muffin tins instead of one big dessert is nice to give everyone their own individual dessert or as little give away treats for friends).
        2. Combine eggs, yolks, powdered sugar, vanilla, salt, milk & cream in blender.  Blend for a few seconds to combine, then add almond flour and AP flour.  Blend until smooth, about 1 minute.
        3. Pour batter into pan or if using muffin tin, evenly distribute batter, top with cherries.
        4. Place in oven and immediately turn down heat to 325 degrees.  Bake for approximately 30 - 45 minutes or until a knife inserted in the center comes out clean.
        5. Cool and dust with powdered sugar.  Use reserved syrup to decorate serving plate if desired.

        Cherry Clafouti


        April 15, 2012

        Loco for Coco...


        I love coconut, always have.  I love the smell of it just as much as the taste.  So much so that in the middle of winter when sunny days at the beach seem unfathomable, I open my bottle of sunscreen & put just a dab on my skin so I can breathe in the smell of coconut.  Before you judge, I know for a FACT that I am not the only one that does this...

        The only thing that I don't love about coconut is trying to get it open & get to the good stuff, but luckily for me I am not a cast member on a survival show, so I needn't worry about all that...

        To demonstrate my slightly obsessive love for this tropical treat,  a moment of full disclosure:
        For breakfast I had coconut coffee and a piece of this coconut bread. 
        Those you of that know me, know that I'm not very "gray"...  I either really like something or I really don't,  and I really like coconut.

        A few weeks ago, I was in the mood for coconut bread so I started looking for recipes and found one in an old issue of Gourmet magazine that I decided to use as my jumping off point.  It was delicious as is, but I felt it could be slightly coconut-ier, so I tweaked it to add in extra coconut flavor and this is what I came up with...

        Coconut Bread
        • 1/3 cup butter
        • 1/8 cup coconut oil
        • 1 cup sugar
        • 2 eggs
        • 1 cup toasted coconut
        • 3/4 cup sour cream
        • 1/4 cup plain yogurt
        • 1 2/3 cups all-purpose flour
        • 1/3 cup coconut flour
        • 1 tsp baking soda
        • 1 1/2 tsp baking powder
        Coconut oil

         1.  Preheat oven to 350 degrees
         2. Warm coconut oil in a small saucepan, just until it melts and set aside.  (when buying, make sure to buy medium heat, organic, unrefined)
         3. Cream butter and sugar together.  Add eggs and cooled coconut oil.  Mix well to combine, then add in yogurt and sour cream.


        4. Stir in toasted coconut.
        5. Combine flours, baking soda & baking powder, and fold into the wet ingredients.
        6. Tip batter into a loaf pan that has been lightly greased and bake for 45 - 60 minutes.
          *if bread is starting to brown too much before it has baked through, turn oven down to 325 degrees for the last 15 minutes.
        Coconut Bread


        February 19, 2012

        And the award goes to...

        Picture it...  Ohio, early 1980's.  A girl and her Momma, glued to the television watching movie stars walk the red carpet.  We used to watch the Oscars as if it were a runway show during fashion week.  I feigned interest in the actual awards part of the show, but to be perfectly honest I didn't really care who won "Best Picture".  My Mom was letting me stay up past my bedtime and that was award enough for me.

        I have friends who host elaborate Oscar parties and I must admit the thought of it has crossed my mind on more than a few occasions, but considering the size of my shoebox apartment it doesn't seem to be an option this year.

        However, just because I won't be hosting a gathering doesn't mean I can't make some good party food...

        I tried to keep it fairly simple, with options that could be served warm or at room temperature.  These can also be transported fairly easily if you are a guest bringing a little something to the festivities.


        Mini twice baked potatoes with creme fraiche & caviar
        • 12 baby Yukon potatoes
        • 1/4 cup creme fraiche or sour cream
        • caviar
        • 2 or 3 pieces chives
        • a few tablespoons of milk
        • 1 tbsp. butter
        • salt & pepper
        • olive oil
        1. Preheat oven to 350 degrees.
        2. Cut potatoes in half (or if very small, just trim the top off) and then cut a small piece off the bottom so the potato will sit level on a plate.
        3. Using a small melon baller or a 1/4 tsp measuring spoon,  scoop out the potato.
        4. Toss the cut potatoes in a few tablespoons of olive oil, salt & pepper and roast for about 20 - 25 minutes until a knife can easily pierce them.
        5. While the potatoes are roasting, use the scooped out bits of potato to make mashed potato with a few tablespoons of milk and the butter.  Season with salt & pepper.
        6. When roasted potatoes are done and cooled, fill with mashed potato, top with creme fraiche, a piece of chive and caviar.


          Mini Quiche
          • 24 mini shells, blind baked
          • 1/2 cup quiche filling (bacon, onion, spinach, mushrooms, etc.)
          • 1/2 cup shredded cheese
          • 1 cup milk
          • 1 cup heavy cream
          • 6 large eggs
          • 1/2 tsp. salt 
          • pinch freshly ground black pepper
          1. Preheat oven to 325 degrees
          2. Make quiche custard by whisking together milk, cream, eggs, salt & pepper
          3. Fill quiche shells with cheese and vegetables or bacon (whatever you've chosen to use)
          4. Pour custard into shells and bake for approximately 12 - 15 minutes.
          *You will have custard left over.  As quiche is baking, the filling will settle and you may have to top off the quiche with a little more custard about halfway through.


          Quiche Suggestions:
          1. Lorraine: caramelized onion, bacon & swiss
          2. spinach & goat cheese
          3. mushrooms & manchego
          4. smoked salmon, cream cheese & chives
          5. red pepper & goat cheese
          6. caramelized onions & gruyere
          7. broccoli & cheddar
          8. asparagus & truffled pecorino


          December 26, 2011

          Corn Thing... You Make My Heart Sing

          Corn Thing...  I think I love you.  I should be mortified that I'm putting this "recipe" here, but honestly it's so good I think I get a pass.

          I dare say this barely qualifies as a recipe.  Anyone with even little to no cooking experience can dump out the contents of a box, mix it together, throw it in an oven and (hopefully) pull it out before it burns;  but let me reiterate- this thing is so yummy it makes up for its ridiculous simplicity and albeit slightly "white-trashiness".

          This alongside a piece of glazed ham is divine.


          Corn Thing
          • 16 ounces frozen corn
          • 1 can cream-style corn
          • 1 box corn muffin mix
          • 1 cup (8 oz) sour cream
          • 2 eggs
          • 1/3 cup butter, softened
          • 1/2 tsp kosher salt
          • 1/4 tsp fresh black pepper

          1. Beat butter and eggs together. 
          2. Add sour cream and corn.  Stir to thoroughly combine.
          3. Add muffin mix and stir to combine again.
          4. Pour into a 9x9 glass baking dish and bake at 350 for 45 - 60 minutes. 
                **A knife inserted in the center should come out clean to test for doneness.


            May 17, 2011

            17th of May

            These days my neighborhood is primarily Italian,  but rewind a couple of decades and you'd see a very different picture.  A few blocks over from where I live now used to be Scandinavian, specifically Norwegian.   The streets used to be lined with Norwegian bakeries, stores, restaurants, etc. but unfortunately the majority of these have disappeared.  However, all is not lost...  every year there is a 17th of May parade, which is a national holiday in Norway marking the signing of their constitution and the best part (besides the food) are the people dressed in traditional clothing showing off their Norwegian pride.

            photos courtesy of Keith Alexander


            Norwegian food is very subtle and delicate in its flavors and I have been lucky enough to have been exposed to some of its more delicious offerings.

            One of my favorite things are Norwegian sandwiches,  it may sound simple and not too exciting but they are delicious!  There are classic sandwiches that all Norwegians are familiar with, but the combinations are virtually endless so it gives you a chance to get your creative juices flowing if you feel like changing it up a bit.

            To make Norwegian sandwiches:

            You'll need very thin sandwich bread, like the one pictured above, the first step in EVERY sandwich is spreading a thin layer of butter on the bread.   See,  we're off to a great start already!

            Next, you choose your toppings.  Norwegian sandwiches are open-faced,  so presentation counts.


            Here are a few of my personal fav's:    1. Gjetost (Norwegian cheese), this cheese is almost sweet and caramelly.  I know it sounds like an odd description for cheese, but it is unbelievable.
            2. Liverwurst and Sweet Relish
            3. Hard-Boiled Egg and Dill
            4. Roast Beef and Jarlsberg
            5. Ham and Mayo with Dill

            the perfect light supper


            These meatballs are absolutely superb!

            Norsk Meatballs
            1/2 lb ground chuck
            1/2 lb ground pork
            1/4 lb ground veal
            1" slice of bread
            2 eggs, beaten
            1/4 cup finely chopped onions
            3 TB chopped parsley
            1/4 tsp. paprika
            1/4 tsp. nutmeg
            pinch of allspice
            salt & pepper

            -Soak bread in water for 5 minutes.  Mix well with rest of ingredients and shape into balls.  Fry in butter (with a little oil).  Add 2 cups beef stock (or broth) and simmer 15-20 minutes.
            -recipe courtesy of Elsa Berg


            Although I am not Norwegian (however the Vikings did land in my father's country...so who knows) it is fun to partake in the neighborhood festivities and enjoy the celebration.
            Happy Syttende Mai!