July 19, 2012

Too much of a Good Thing?


This is about the time of year when people who are lucky enough to have prolific gardens start to feel overwhelmed by the sheer volume of gorgeous bright red tomatoes and beautiful zucchini that their loving care has yielded.   A problem I'd like to have, quite honestly...

Growing up, my grandparents next door neighbors had a garden behind their house. By the end of July, it was practically bursting at the seams.  Every summer we were the grateful recipients of brown paper grocery bags filled with tomatoes and cucumbers from his garden.  The trade off was the newspaper.  One of us was sent next door to give them the paper every day after my grandparents had read it and in turn, every few days he left a bag of fresh from the ground veggies on the back porch.  Not a bad arrangement.

If you find yourself overrun with tomatoes, zucchini, peppers, etc...  this recipe is perfect!  It utilizes all of the wonderful produce of summer in a healthy vegetarian dish that is... well, super yummy.  

Ratatouille can be eaten warm,  at room temperature or even cold. It is substantial enough to stand on its own or it can be served alongside roast chicken or tossed through your favorite pasta.

I have sandwiched it in a crusty ciabatta roll for lunch or served it on sliced, toasted baguettes as an hors d'oeuvre with a glass of wine.  This recipe is the epitome of summer, there really is no wrong way to enjoy it.

So, next time you are out in your garden or like me, gazing wistfully at other people's gardens, hands on hips, wondering what the heck to do with all of those little gems you've grown...  now you know.


Ratatouille

There are many variations on this dish.  Some call for sliced vegetables, some rough chopped, some demand that each veggie be cooked separately, some just throw them all in the same pot.  As long as you are cooking, enjoying the process and the food tastes good...  do whatever makes you happy.

This is a variation on Julia Child's recipe.  I changed a few things to make it more to my taste, feel free to do the same from here.  More of what you like, less of what you don't.


  • 1 lb eggplant, peeled & cubed
  • 1 lb zucchini, diced
  • 1 red pepper, diced
  • 1 yellow pepper, diced
  • 1 large onion, diced
  • 2 cloves garlic, smashed
  • 3/4 lb firm, ripe tomatoes, peeled & seeded, chopped
  • 1/3 cup olive oil
  • 2 tbsp kosher salt
  • 1/2 tsp freshly ground black pepper
  • a few sprigs fresh thyme
  • 2 bay leaves
  • 2 tbsp minced parsley
  • 1 tbsp basil, finely sliced (chiffonade)
Toss eggplant with 2 tsp salt and set inside colander to drain.  Place a small plate on top to weigh it down and let stand for 30 minutes.

Heat a few tbsp olive oil over medium heat and saute eggplant for a few minutes until lightly browned.  Remove eggplant from pan, add zucchini and saute until lightly browned. Remove zucchini & set aside.

In the same pan, cook onions and peppers slowly in olive oil for about 10 minutes until tender, but not browned.  Add more oil if necessary.  Add garlic, thyme & bay leaves, season with salt and pepper.


Add tomatoes and cook over low heat for 5 minutes until tomatoes render their juices.  Then raise heat and simmer for several minutes until liquid has mostly evaporated.
Return eggplant and zucchini to the pan and stir to combine. 

Let simmer for a few minutes allowing flavors to combine, remove from heat and stir in parsley and basil.


Excerpted from Mastering the Art of French Cooking by Julia Child. Copyright © 1961 by Alfred A. Knopf. Reprinted with permission from the publisher Alfred A. Knopf, a division of Random House, Inc


.

July 15, 2012

Redemption Brownies


Recently, I made brownies and did not have chocolate in the house to melt down.  So, I made them with only cocoa powder.  It was an epic fail.
Lesson learned, do not take short cuts with brownies. 

Feeling extremely unsatisfied with that batch of bad brownies, my craving for them was unfulfilled.
Seeking redemption, I decided that this effort had to be proportionately as good as the last batch was bad...  meaning, these brownies had to rock. 

I had about a cup of dulce de leche left over from this and aside from eating it straight from the container with the biggest spoon I could find (a thought which I seriously entertained), I decided that I should be a bit more creative.

Needing to expunge the memory of these humdrum brownies, it was clear that this was what my leftovers were intended for.

Making brownies from scratch takes about 5 minutes longer than making them from a box.   The only extra step is melting chocolate into butter, the rest of the process is the same. 

To say that brownies from scratch are the same as boxed mix is like saying cheese in a can is the same as an aged cheddar.

We have all used boxed mixes or frosting in a can, but sometimes you need to have the real thing and this is most definitely the best brownie I have ever made.


Dulce de Leche Brownies

  • 8 tbsp unsalted butter, room temp
  • 6 ounces bittersweet or semisweet chocolate, finely chopped
  • 1/4 cup unsweetened Dutch-process cocoa powder
  • 3 large eggs
  • 1 cup sugar
  • 1 tsp vanilla extract
  • 1 cup flour
  • 1 cup dulce de leche


Preheat the oven to 350 degrees.


Line an 8-inch square pan with a long piece of parchment paper or aluminum foil that covers the bottom and comes up over the sides.  Place another sheet over, making a large cross with the edges that overhang the sides.  Grease the bottom and sides lightly with butter or non-stick spray.

Melt the butter in a medium saucepan.  Add the chocolate pieces and stir constantly over very low heat until the chocolate is melted.  Remove from heat and whisk in cocoa powder until smooth.  Let cool slightly, to ensure eggs do not "scramble" when added.  Add eggs, one at a time, then stir in sugar, vanilla, then flour, just to combine.  Do not over mix.


Scrape half of the batter into the prepared pan.  Drop one-third of the dulce de leche, evenly spaced, over the brownie batter, then drag a knife through to swirl it slightly.  Do not drag the knife through too many times, or you will not have lovely pockets of dulce de leche, you will have incorporated it into the batter.

Spread the remaining brownie batter over, then drop spoonfuls of the remaining dulce de leche in dollops over the top of the brownie batter, drag a knife through to swirl again.  Try not to drop the dulce de leche exactly where you did underneath, that way you will get an even distribution throughout.


Bake for 35 - 45 minutes.  The brownies are done when the center feels just-slightly firm.  Remove from oven and cool completely.   Lift out of pan with overhang of paper/foil.


These brownies actually become better the second day and will keep well for up to 3 days.


Recipe: David Lebovitz,  The Sweet Life in Paris


    July 10, 2012

    Thai Chicken Salad


    In my continuing effort to avoid turning my kitchen into the sweltering fires of hell,  I decided that this time I would cheat a little.  Just a little,  and it's for the greater good.   The heat index is hovering in the triple digits while beads of sweat are pooling at the nape of my neck.  The least entertaining thought at this moment is "let's fire up the oven".

    Store-bought roast chicken: In the winter months, this would be considered sacrilege... but in the blistering heat of summer, it is sweet salvation! 

    As if buying the chicken wasn't enough, the food processor is going to do the majority of the work!  Yep, this might be the perfect summer recipe.  The amount of work involved barely even registers.  If you don't own a food processor it isn't the end of the world, just a bit of chopping & grating.

    For this recipe I only used the breast meat,  reserve the rest for sandwiches or soups,  the carcass for stock, etc.


    For the dressing:
    • 3 tbsp rice vinegar
    • zest and juice of 2 limes
    • 4 tbsp vegetable, canola or grapeseed oil
    • 1/2 shallot, finely sliced
    • 1 clove garlic, minced
    • 1 1/2 tbsp sugar
    • 1 red Thai chili (green if you can't find red), minced 
    • salt & freshly ground black pepper to taste

    I went to 5, yes FIVE stores trying to find a red chili but with no luck, so I ended up with green.  The main difference is the heat level.  I couldn't find a pepper with a decent amount of heat to it, so I had to use what I could find.  If this happens to you as well and you like a little heat in your food, you can add a dash of sriracha or any other hot sauce that you like.

    Combine all ingredients and set aside.  Let dressing sit for at least 30 minutes.  The acid will help break down and mellow garlic & shallot and the flavors along with the chili pepper will infuse dressing.   I like the acidic bite of vinegar & lime juice however, if you find it's too much cut the limes to one.

    Thai Chicken Salad
    • 1 small head green cabbage
    • 2 - 3 medium carrots
    • 2 cooked chicken breasts, shredded or finely sliced
    • small handful of salted peanuts, roughly chopped
    • 1 bunch scallions (green onion), sliced on bias
    • 1 cup snow peas, thinly sliced on bias
    • 1 tbsp cilantro, chopped
    • 2 tbsp Thai basil, chopped
    • 2 tbsp mint, chopped
    • salt & pepper to taste

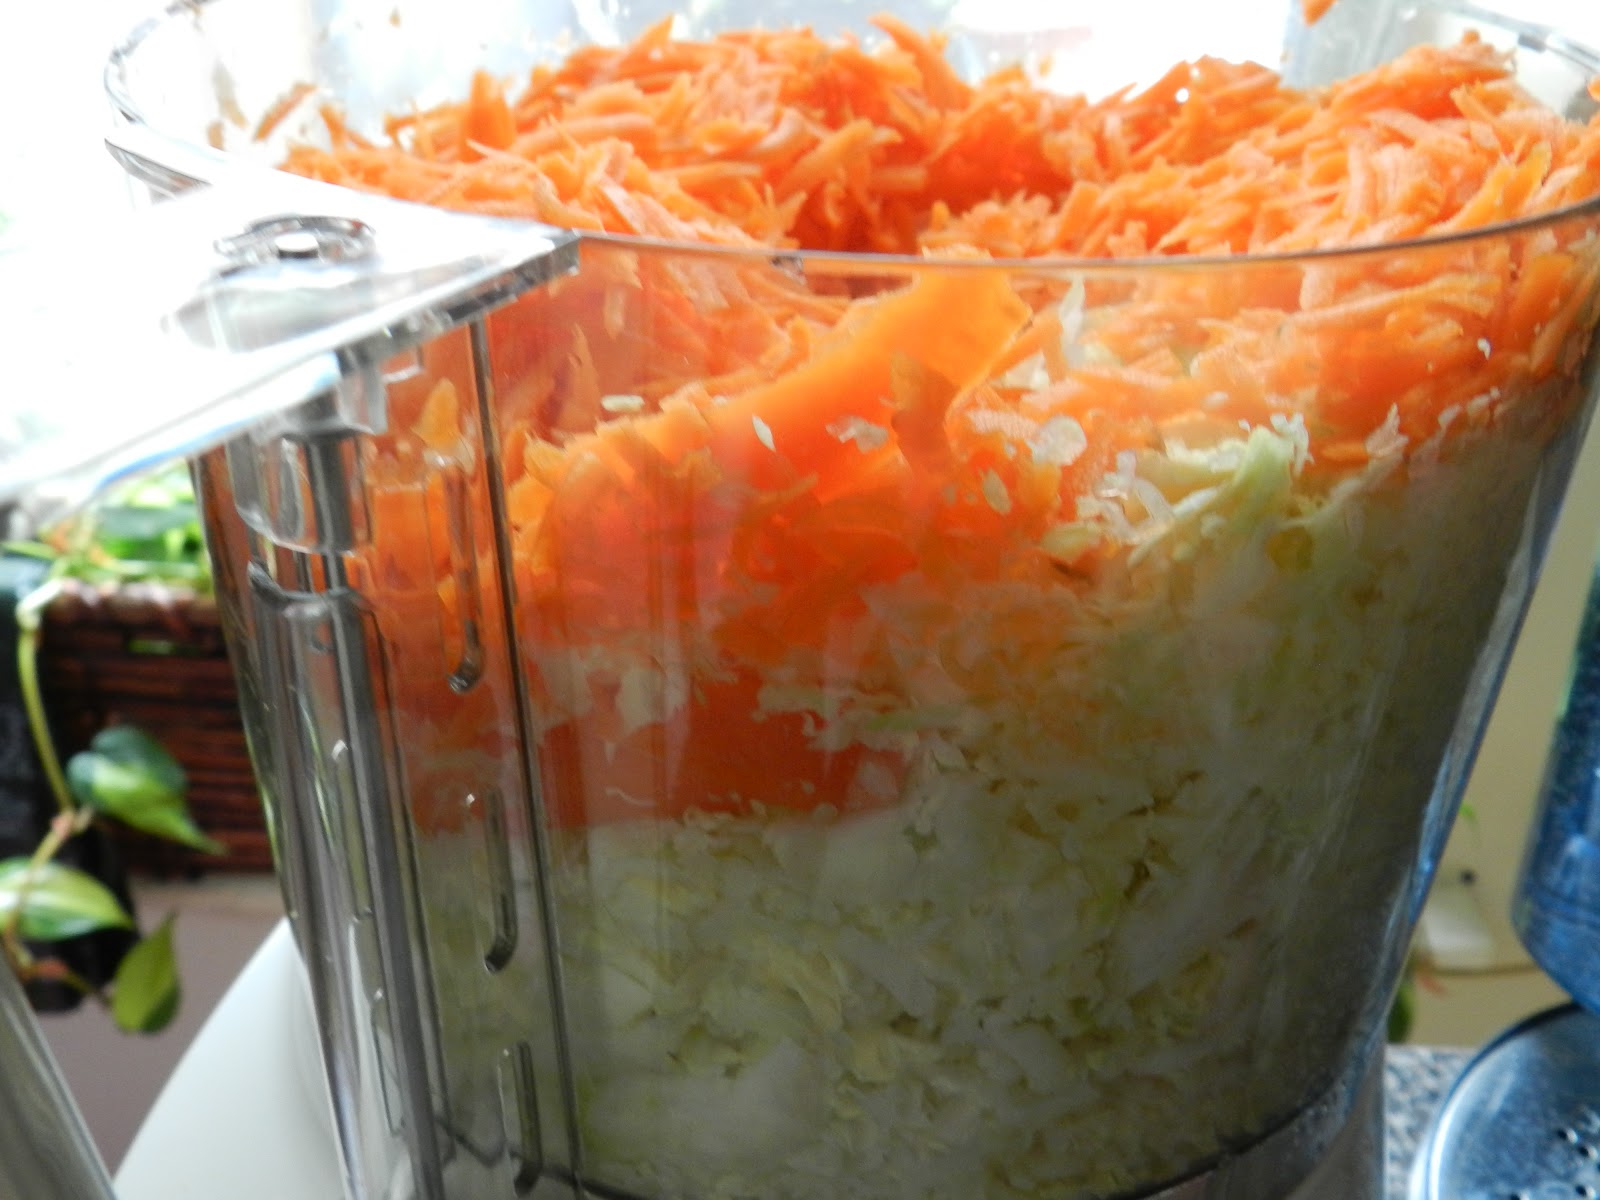
    Shred cabbage and carrots in food processor. 


    Combine all ingredients in large bowl, pour dressing over top and mix thoroughly.
    How's that for easy?!


      July 05, 2012

      Can't Stand the Heat...


      Summer time is when I really enjoy salads.  The anemic tomatoes of winter are happily forgotten and replaced with gleaming, juicy, bright red beauties.  The delicious, but boring cucumbers can go on hiatus along with their carrot friends. 

      The same ol' stuff that routinely finds its way into your salad can go by the wayside to make room for things like stone fruit! 

      Sometimes we are on auto-pilot and occasionally get stuck in a bit of a rut. Considering all of the amazing things available to us in the summer, this is the time to branch out and mix it up.

      Making a salad for dinner is a great option. The clean up is pretty minimal and the ingredients are merely a suggestion.  Use it as a jumping off point for an idea;  if you don't like an ingredient, swap it out for something you do like...

      Perhaps the most important reason to go with a meal that takes about 10 minutes from start to finish:

      Generally speaking, most of us are less inclined to spend hours in front of a stove during a 90+ degree heat wave.  The air is stagnant.  It just hangs there... completely still, while your tolerance for anyone within a 5 foot radius decreases exponentially by the minute.


      Spinach Salad with Nectarines & Blue Cheese
      serves 1 hungry girl
      • 3 oz fresh baby spinach (a little more than half of a 5oz container)
      • a handful of toasted, sliced almonds
      • 5 -6 dried figs, sliced in half or quarters
      • 1 ripe nectarine, pit removed & thinly sliced
      • 2 oz blue cheese, broken into bite size pieces
      Mis-en-place

      There are only 5 ingredients in this salad, so make sure they are of the best quality you can get.  Spring for the good cheese, don't buy the stuff that is already crumbled.  It tastes like Styrofoam.  Make sure the nectarine is ripe & luscious, under ripe fruit doesn't have any flavor.

      Normally when I make this salad, I add in crispy prosciutto.  Place a few paper-thin slices of prosciutto on a non-stick (Silpat) silicone baking sheet if you have one or parchment paper if you don't, put this on a rimmed baking (cookie) sheet and bake at 350 degrees until super crispy.

      Fresh mozzarella works beautifully in this salad if you don't like blue cheese.  As with the blue cheese, get the good stuff, not the shredded cheese in a bag that you would throw on a pizza.

      Fig Vinaigrette
      • 1/2 shallot
      • 1 tbsp fresh thyme leaves
      • 3 tbsp fig balsamic vinegar (not the sweet, reduced balsamic glaze)
      • 1 1/2 tbsp sherry vinegar
      • 3/4 cup olive oil
      • kosher salt & freshly ground black pepper to taste
      In a blender (or with a stick blender) combine all ingredients EXCEPT oil.  Blend on medium speed until thoroughly combined, then lower speed and slowly drizzle in olive oil. 

      (If you are fighting the urge to do your worst Bill Cosby impression, then clearly your dressing resembles chocolate pudding and you've taken your vinaigrette too far.  Thin it out with a splash of vinegar or a tbsp of water.)

      Devour.


      .

      July 01, 2012

      On the Go...


      It's finally summer and you know what that means...  picnics, barbecues and long days at the beach.
      This pasta salad is perfect for taking on the go.  It is light, yet substantial and dressed in a light vinaigrette, so no worries over gloppy mayo sitting out in the sun.

      I love this particular pasta salad because of all the veggies in it and you can even add more...  broccoli, julienned zucchini, summer squash, cauliflower, red bell pepper, summer beans, etc. would all be great in this salad.  The beauty of summer is that so much fresh, gorgeous produce is available! 

      One of my goals in summer is to avoid turning on the stove most days...  The black tar roof of the building I live in is my ceiling, need I explain further how I have come to understand what a roast chicken must feel like in the oven?!

      Another goal, I'll be honest is to make enough for left-overs.  I made a big bowl of pasta salad that will feed me for a few days.   I can have it for lunch the next day and maybe as a side for dinner the day after that... or with the 4th of July celebrations right around the corner I will pack it up and take it with me to a barbecue to enjoy with friends.


      Mediterranean Pasta Salad
      • 1/2 lb orzo (tri-color if you can find it)
      • 2 tbsp sherry vinegar
      • 3 tbsp fresh lemon juice
      • 2 tbsp olive oil
      • 1/3 cup marinated, quartered artichoke hearts
      • 1/2 cup grape tomatoes, cut into quarters
      • 1/4 cup sun-dried tomatoes, thinly sliced
      • 1/2 cup cucumber, quartered & thinly sliced
      • 1/4 cup pitted, oil-cured black olives
      • 1/3 cup feta, crumbled (or ricotta salata if you don't like feta)
      • 1 tbsp lemon zest, grated
      • 1 tbsp capers
      • 2 tbsp fresh dill, finely chopped
      • 1/4 bunch parsley, finely chopped
      • kosher salt & freshly ground black pepper


      Cook orzo according to package instructions.   Toss orzo with olive oil to coat pasta.
      Add remaining ingredients and toss to combine.  Season with salt & pepper.
      Eat!


        June 20, 2012

        Salty Sweet Delicious Treat


        One of my favorite treats when I was young was homemade caramel corn.  Now let me tell you, this was a rare treat indeed.  I nearly had to beg with tear-filled eyes to get it because making it left a sink full of dirty dishes and a bit of a mess in the kitchen.

        My grandmother would would make the popcorn on top of the stove, as we didn't have a microwave then, and then she would make the caramel and drizzle it on top of the popcorn and mix it up as fast as possible before all hardened.

        There is nothing like it.  The caramel corn you buy at the grocery store can't even come close to homemade.  There are pieces that are just barely kissed with caramel, then there are other pieces that are fully enrobed in caramel...  nothing perfect and homogeneous about Grandma's caramel corn and that is part of what made it so good.

        I wanted to put a  twist on this most delicious treat and elevate it to something you could actually serve to guests (not that I wouldn't put out a big trough of caramel corn, but you know what I mean).

        Instead of making a traditional dulce de leche, I know there is a "cheat" method which simply involves simmering the can with a few holes poked through the top.  I must be honest, this never appealed to me. 

        I'm a bit of a purist with most things and I will admit, simmering milk in a can was a bit unsettling and it seemed kind of lazy.   Those of you that have done it, I know what you're thinking, so let me save you the trouble. 

        Shame on me.  It was AWESOME!  I thought it would somehow taste metallic (it didn't) and that it couldn't possibly be as good as making it the "right" way (it was damn close).

        It was almost zero effort except for a little whisking when it came out of the can.  It couldn't have been easier.  Really. 

        This revelation has made me seriously question why I was so snobby about not making it like this before.   I doubt that I'll give up my purist ways, but once in awhile when I'm short on time or energy, this will be my method of choice.


        Salted Dulce de Leche Popcorn Tart
        makes 3 - 4" tarts or 1- 9" tart
        • 1 can sweetened, condensed milk
        • 8 cups popcorn (buy it, pop it on stove, microwave...  doesn't matter)
        • 4 tbsp butter, room temp
        • 2 tbsp sugar
        • 1 tsp kosher salt
        • 1/4 tsp freshly ground black pepper
        Carefully make 3 holes in the top of the can by hammering a nail through the lid.  (I am shaking my head as I'm typing this...  I can't believe this is a step in a recipe).  Most people only make 2 holes, but I felt better giving the pressure inside the can another outlet from which to escape.  Exploding can of condensed milk was not on my agenda.

        Set the can inside of a pot and fill with water until the water is about 3/4 the way up the side of the can.  Bring to barely a simmer and let it go for 4 hours.  You will have to replenish the water occasionally so that the level doesn't get too low.  You want to make sure the water is at least halfway up the side of the can at all times.

        After 4 hours, carefully remove can from hot water and open.  Pour contents into a bowl & whisk about 4 - 5 minutes until smooth.   That's it.  Really.


        To make popcorn crust:  Combine popcorn, butter, sugar, salt & pepper in food processor and blitz until rubble.

        Press the popcorn mixture into tart mold(s).  I prefer the ones with a removable bottom, it makes getting the tart out much easier.  Use a small measuring cup or glass with a flat bottom to press into the sides and bottom of tart to make sure everything is even.


        Refrigerate for an hour.  This will allow everything to set up, the butter to harden, etc.  Place into a 375 degree oven for 10 minutes.  Remove from oven and let cool completely.

        Pour dulce de leche into cooled popcorn crust and top with flakes of sea salt.  Dig in.


        June 15, 2012

        Herbed Heirloom Eggs & Crispy Roasted Mushrooms


        This weekend is Father's Day and while most Dads will be grillin' & chillin', they'll need a little fuel to get the day started.
        This is a perfect breakfast or brunch to start Dad's day.  It is substantial, but not too heavy and it is absolutely delicious.

        The roasted mushrooms take on an almost meaty taste and texture and the slight crunch from roasting them is unexpected.

        This Sunday,  treat Dad to a special brunch and let him know you appreciate him.


        Herbed Heirloom Eggs and Crispy Roasted Mushrooms on Grilled Baguette

        • 4 Heirloom or Organic Eggs
        • 1 tbsp butter
        • 1 tbsp chopped chives
        • 1 tsp chopped parsley
        • 2 tbsp crème fraîche  (or sour cream)
        • 1 lb. assorted mushrooms (cremini, button, shiitake)
        • 2 tbsp olive oil
        • kosher salt & freshly ground black pepper
        • 4 slices baguette, cut on bias


        Preheat oven to 400 degrees.  Wipe mushrooms clean, if needed, and thinly slice.

        Lay mushrooms in a single layer on a baking sheet and drizzle with olive oil.

        Season aggressively with salt and pepper.  Toss to evenly coat and roast for approximately 20 minutes or until crispy.

        Remove from oven and set aside.


        Heat grill pan (or broiler if you don't have a grill pan) and lay pieces of baguette on hot pan.  If necessary, weigh them down with a heavy lid so the bread makes contact with the grill.

        When the bread has golden grill marks on it, turn over and toast the other side.  Remove from heat and set aside. 


        In a non-stick pan, melt butter over low heat.  Crack eggs into a bowl and lightly scramble with a fork or a whisk.

        Pour eggs into pan, season with salt and pepper, stir in crème fraîche, chives and parsley.
        Cook gently, stirring frequently over low heat until eggs are creamy and still slightly soft.

        Do not overcook eggs until they have dried out. 

        Top toasted baguette with eggs and roasted mushrooms.